Here's a guide for installing quarter round molding for DIYer's ready to upgrade their space.
A half day
Intermediate
$100 - $150
Introduction
This step-by-step guide on how to install quarter round trim covers everything from cutting to achieving seamless painted finishes.
Welcome to Family Handyman’s Guide to Gorgeous Floors, where you can find all the essential tips and tricks for achieving the floors of your dreams and keeping them looking good as new for years to come.
The last step in most flooring installations is installing quarter-round molding. Quarter round is used interchangeably with shoe molding. Both do the same thing but have a slightly different profile.
The driving force behind using quarter round or shoe molding is to hide the unsightly gap left between the wall and flooring. When flooring is installed, the manufacturer recommends leaving a gap along the outer edge of the room to allow for expansion and contraction. This intentional gap prevents the flooring from rejecting its substrate, causing buckling that compromises the life of the flooring material. What most people don’t know is, quarter round and shoe molding can also save energy by closing off cracks where drafts can come in and heat can escape.
This project covers painted quarter round installation. The process is the same for stained wood quarter round, except the finishing touches require wood-toned filler, stain, and clear coat instead of paint and caulk. Installing quarter round is not a difficult DIY project. Here are the steps to installing quarter round.
Tools Required
- 18g Brad nail gun
- Caulk gun
- Measuring tape
- Miter saw
- Painting supplies
Materials Required
- 1-1/2" 18ga. brad nails
- Caulk
- Fine-grit sandpaper
- Paint
- Painter's tape
- Primer
- Quarter-round molding
- Wood filler
Project step-by-step (7)
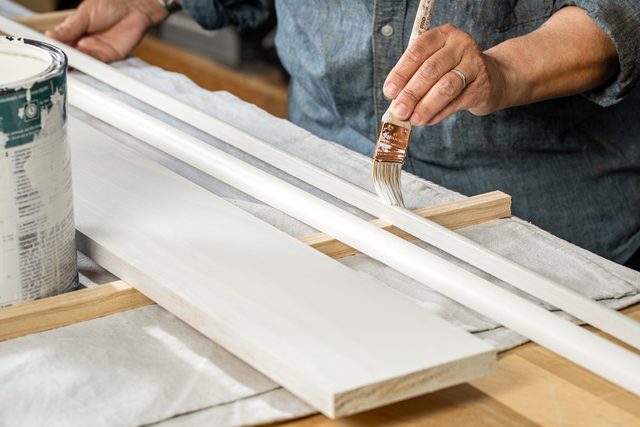
Paint before cutting
Measure the linear feet of the walls where the quarter-round is going to be installed. Purchase this plus 10% more material than measured to account for mistakes and miscalculations.
Paint the quarter-round before you cut and install. Final touch-ups are much easier when the quarter-round being installed is painted prior to installation. You may still have to mask off or tape along the floor to prevent paint on the flooring during touchups, but you won’t be on your knees nearly as long.
If the quarter-round is not primed, prime it before you paint. Primer will help your paint job look better and last longer.
For a truly smooth paint finish on your quarter-round, use self-leveling paint with a foam roller. Regular paint or regular paint rollers may possibly leave a texture.
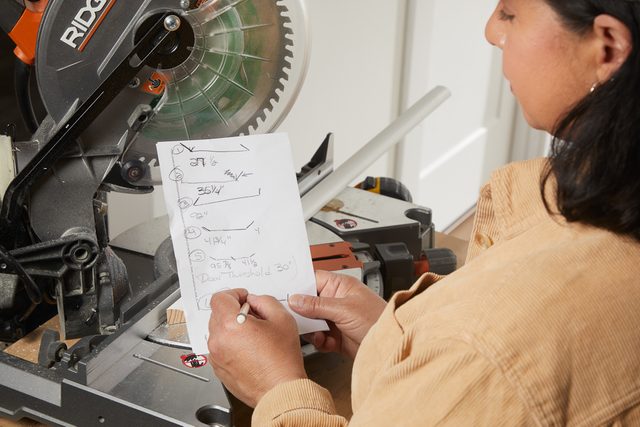
Plan your cuts
When taking measurements for your cuts, plan how you want to take notes and be consistent. Feel free to draw out the angles for each cut – it is much easier to draw it out and visually see it then trying to decipher inner, outer cuts with measurements.
Being as detailed as possible with your cut list will help avoid confusion when you are at the miter saw. When measuring, choose to start at one side of an opening and work your way around the room. Note three important items for each piece: length and what kind of cut on each end. Example: 39-1/2-in. long. Left side, inner corner. Right side, outer corner. If the room has lots of different angles other than 45-degree corners, mark these too.
To camouflage seams cut in the middle of a wall, join them with a 45-degree angle rather than just butting the two sticks of quarter-round up to each other. It helps the wood tuck into itself, making the seam of two joined pieces less noticeable.
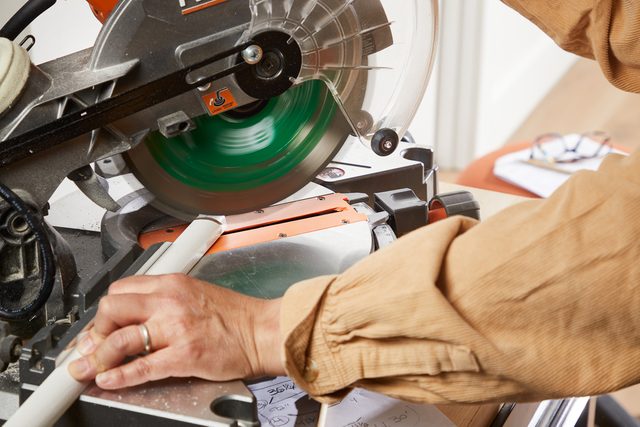
Cut your pieces
To maximize the yield in your material, the order you make the cuts will NOT be exactly in the order of the measurements you took. To get the highest yield out of your materials at the miter saw, cut longer pieces first. Then use your cutoff pieces to work your way down your cut list in diminishing measurements, ending with the smallest pieces cut last.
Keep in mind, your measuring point and cut point will reflect the parts of the baseboards that are touching the wall. It is easy to get confused with inner corners and outer corners.
To avoid confusion, label the back of each piece or give the piece being cut a number that corresponds to your cut list. Keeping all the pieces for one wall together will also help prevent a frustrating puzzle game when you get in the room with all your cut pieces.
As a safety measure, make initial cuts a little longer (1/8-in. to 1/4-in.) so you can make exact cuts after you do a dry fit. Having a portable miter saw in the room with you helps significantly and makes cutting more efficient. As you gain confidence in your measurements and cuts, you will be less likely to feel the need to leave pieces long and adjust with additional cuts.
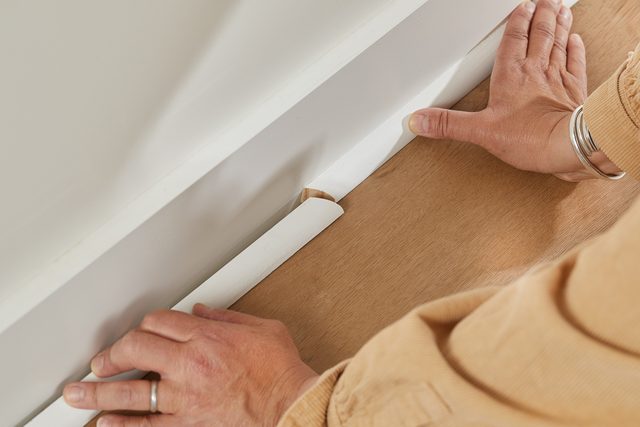
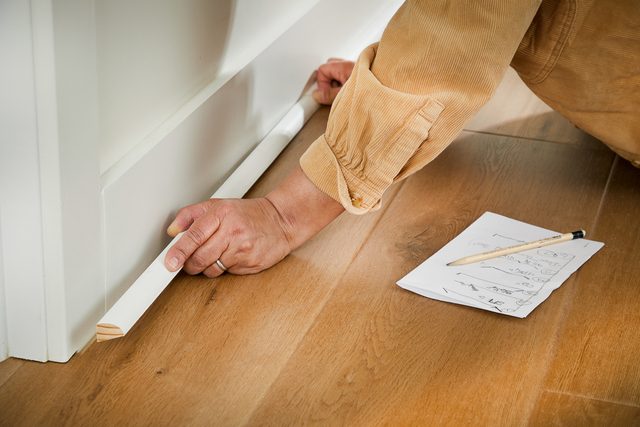
Dry fit the pieces
To ensure accuracy, always dry fit all connecting pieces before you nail them into place. This will allow you to make additional cuts if needed and troubleshoot before the actual installation.
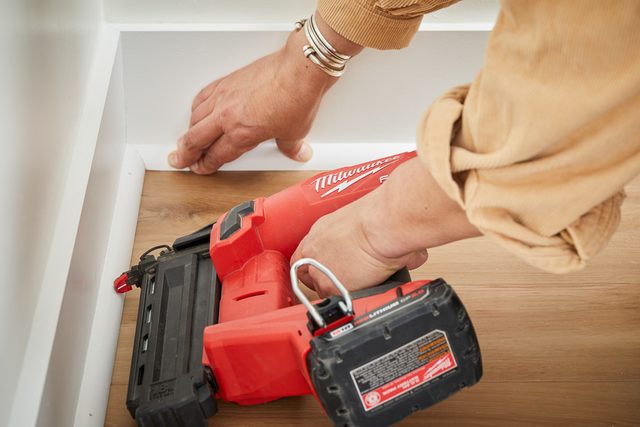
Nail the quarter-round in place
Use 1-1/2-in., 18-gauge brad nails to secure the quarter-round snugly to the baseboard molding every 16 to 20 inches—more if the wall is abnormally crooked. 18-gauge brad nails also create smaller holes than 16-gauge nails, which will make touchups and putty less challenging and time-consuming.
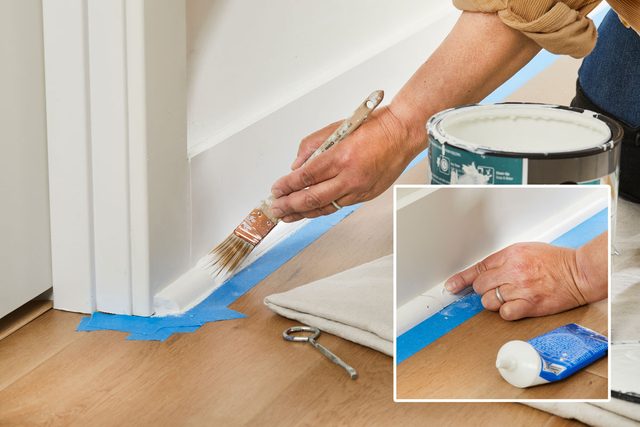
Finishing Touches
Fill all nail holes with wood filler, slightly overfilling each hole. Some people skip this step to save time, but filling nail holes creates a more professional look. Allow the filler to dry completely before sanding flush with fine-grit sandpaper.
Next, apply paintable caulk to the corners and any seams where two pieces meet in the middle of a wall. Because caulk is flexible, it prevents cracks from appearing if walls move or flex over time. Use paintable caulk for easier cleanup, faster drying time, and better paint adhesion. Smooth the caulk with your finger or a caulk tool before it begins to skin over, then allow it to dry.
Finally, touch up the paint to hide nail holes and seams so they disappear and are no longer noticeable. To protect your finished surface during painting, use painter’s tape on the floor where the quarter round meets the flooring.
FAQ
What is quarter-round molding?
The profile of quarter-round molding is exactly as it sounds: a rounded molding with a quarter-circle profile and two flat sides that are the same height. It is often used as a finishing detail around the edges where flooring meets a wall.
Is there a difference between quarter-round molding and shoe molding?
Quarter-round molding and shoe molding are often confused because they are both used to cover and conceal any gaps between flooring and a wall. The difference between these two types of trim molding is in the profile. A quarter round has a rounded quarter of a circle profile where the two flat sides are the same height (ex. 3/4-in. x 3/4-in.). Shoe molding is taller than it is wide (ex. 3/4-in. x 1/2-in.), but can be found in different versions and not always rounded. Because shoe molding has different dimensions in height and width, you must keep track of the orientation when making miter cuts to ensure a good fit when joining the pieces in a corner.