


Get expert-backed laminate flooring installation tips to avoid humps, bumps, gaps and cracks during your next project.

Welcome to Family Handyman’s Guide to Gorgeous Floors, where you can find all the essential tips and tricks for achieving the floors of your dreams and keeping them looking good as new for years to come.
When you’re considering flooring materials that you can install yourself, you’ll hear from retailers, manufacturers and online DIY guides how easy it is to install laminates. While they are definitely easier than hardwood and tile, it’s a bit of an over-simplification to say that installing these snap-together planks is a snap. The job is definitely DIYable, though, especially with the tips for installing laminate flooring provided here.
I learned many tricks from my employer, Naresh Caruso, when working with his flooring installation company, We Do Floors, many years ago, and I developed a few of my own when I struck out on my own and began working solo. Caruso is now retired, but he made himself available for consultation, and together with remodeler Ben Kuhl, we’ve put together these “installing laminate flooring tips” to help you get great results that will last.
1
/
14
Spend plenty of time preparing the subfloor
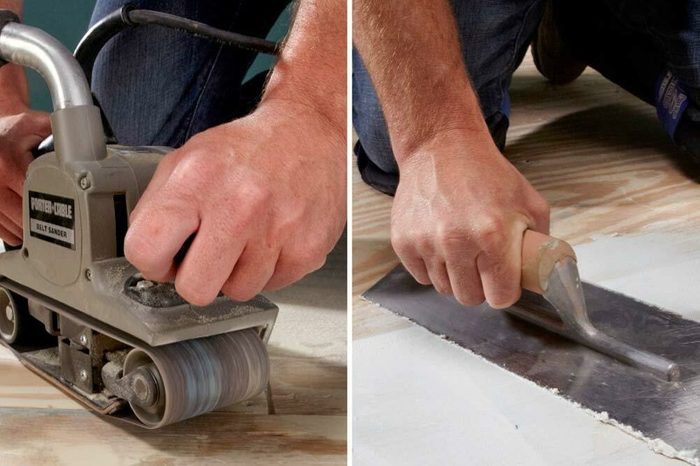
If you’re lucky enough to be working with a perfectly flat subfloor, you can skip this step, but you probably aren’t. Most subfloors have bumps and depressions in the plywood knots or at the seams, and each irregularity is a potential source of cracking and gapping. Kuhl cites failure to prep the subfloor as one of the most common DIY mistakes he sees when remodeling.
Floor leveling compound and your belt sander are your best friends when preparing the subfloor. Mix the leveling compound with water to make a runny mixture, then spread and level it with a trowel and let it harden. Next, knock down high spots with the sander. Finally, sweep and vacuum up the dust. Because the leveling compound needs time to harden, Caruso and I typically allowed two days for this procedure.
2
/
14
Undercut door jambs as part of prep
When you’re laying a new floor, you usually have to cut a quarter to a half inch of material from the bottoms of the door jambs and casings to allow the flooring to slide underneath. You’ll save time and simplify the job if you do this before you start laying the floor. Here’s the method I learned from Caruso and still use:
- Lay a scrap piece of flooring on the subfloor and slide it next to the casing.
- Set a dovetail saw, or a Japanese pull saw (my preference), flat on the spare piece with the teeth facing the jamb.
- Keep the saw flat as you cut through the casing.
- Remove the cutoff and vacuum up the sawdust.
3
/
14

Install underlayment
Underlayment serves two purposes. The first is to block moisture seeping up through the subfloor, and the second, which is just as important, is to provide cushioning between the laminate and the subfloor to make the floor more comfortable for walking. It also adds insulation.
Plastic foam underlayment works best for laminates. It typically comes in four-foot rolls, which means you’ll have to lay sheets side-by-side. Run the sheets perpendicular to the direction of the flooring — I’ve found that if you run them parallel, the seams have a way of bunching up under the flooring, catching in the joints and preventing a tight fit.
It’s super important to seal the seams between sheets to control moisture. You can buy underlayment with pre-taped edges, but if you don’t do that, you’ll also need tape. Rather than using whatever tape you can find around the house, use the product recommended by the underlayment manufacturer.
4
/
14

Give the flooring time to acclimate
If you fail to give the flooring time to come into equilibrium with room conditions, the planks may swell and buckle, or shrink and form gaps, a few weeks or months after installation.
Bring the flooring into the room, unpack it and spread it around, and let it sit for 48 to 72 hours. To save time, Caruso would often spread the flooring out in an adjacent room while doing subfloor preparation in the installation room. This works as long as both rooms are subject to the same climatic conditions.
5
/
14

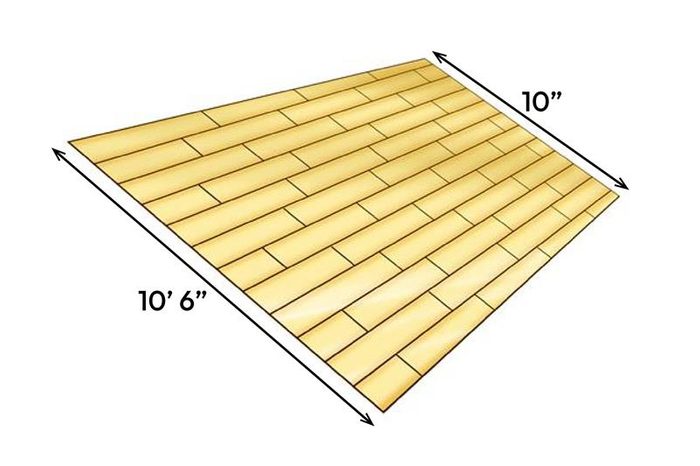
Plan ahead
It’s tempting to find the longest, straightest wall and start slapping down planks. The problem is that when you get to the opposite wall, you may end up ripping down a sliver-thin row of flooring. That won’t look good, and it’s tough to install.
Not being afraid of math, the way I avoid this is to measure the width of the room and divide it by the width of a plank (not including tongue and groove). You’ll get a number with a fraction, and if the fraction is less than a quarter (which means the final row will be a quarter of the width of a plank), rip an inch or two off the planks in the first row before you install them. This increases the width of the final row of flooring by that amount.
6
/
14

Avoid ugly tapers
Most installers lay laminate flooring parallel to the long walls in a room, but here’s the thing: If you start parallel to one of the walls, and the walls aren’t parallel to each other, you’ll end up having to cut tapers in the last row. It’s common for walls to be out of square, and sometimes, the difference from one end of the room to the other is so great that the taper becomes an eyesore.
At We Do Floors, we avoided this by splitting the difference in rooms that were significantly out of square. We measured the width of the room at both ends, calculated the difference, split it in two and tapered the planks on both sides of the room by that amount.
7
/
14
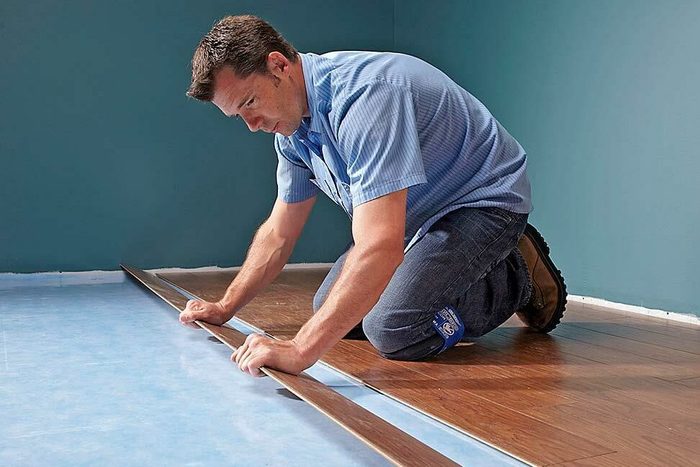
Lay planks perpendicular to floor joists, if possible
When you do this, the floor joists provide extra support for the planks, reducing the risk of gaps forming between them. Joists typically run perpendicular to the long walls in a rectangular room or hallway, so if you run the planks parallel to the walls, you’ll be fine.
This isn’t always necessary in a small home with small rooms, advises tiny home builder Jonathan Palley. Aesthetics or cohesion with the flooring in other rooms may force you to lay the flooring parallel to the joists, and in a small room, that’s usually OK.
8
/
14
Stagger the end joints
If you lay the flooring with end joints lining up with each other, the floor will be less stable, and there’s a likelihood of gaps forming along at end joints. You won’t have a good-looking floor, either, because the lines cross those made by the lengthwise joints and create visual confusion.
The best stagger pattern is random, with the ends of one plank no closer than six inches to the ends of the adjacent ones. Caruso taught me to avoid regular patterns, such as the step pattern (where the stagger varies by a fixed amount) or the “H” pattern, where end joints of planks separated by one or two intervening planks line up. Such patterns are also unsightly.
9
/
14

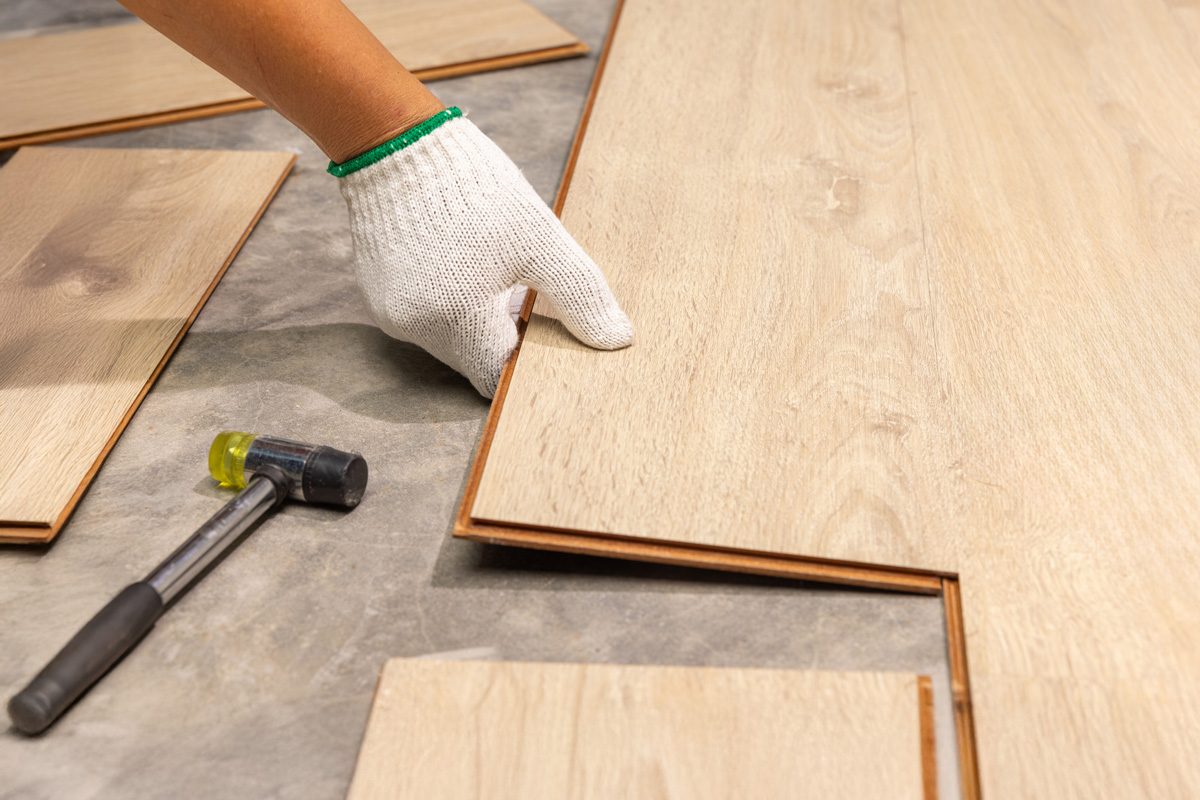
Use a tapping block
Some laminate products come with an installation kit that includes a plastic tapping block. If one isn’t included with your flooring, be sure to purchase one separately. It has a lengthwise notch that butts up against the edge of the plank while staying clear of the fragile locking mechanism, which is easily damaged if you hit it directly.
You’ll need the block to tap boards together lengthwise after you’ve snapped them together (they don’t always fit together snugly), and you’ll especially need it to tap planks together end-to-end. To be extra cautious, it’s a good idea to lock a sacrificial scrap of flooring onto the plank you’re installing and position the tapping block on top of the scrap flush against the edge or next to it. The scrap flooring helps absorb hammer blows and protects the plank you’re installing.
- Pro tip: There are two ways to make end-to-end connections. One is to assemble an entire row, and after making sure all the end joints are tight, snapping that row onto the adjacent one. The method I prefer is to snap each plank into place separately and then use the tapping block to lock the end joints. You may need to hold one end joint down with your foot — or have a helper do it — to get the tongue and groove to line up and the planks to lock together when you tap on the other end.
10
/
14

Leave an expansion gap
The edges of the finished floor should be no closer to the walls than a quarter inch. Failure to leave this gap is another common mistake cited by Kuhl. “I’ve seen hardwood floors buckle and even ‘explode’ under the pressure of wood movement because the expansion gaps weren’t left in place,” he says.
If you have an installation kit, it will have plastic shims that you can set temporarily between the planks and walls to make the gap. If you don’t have these, you can make shims out of 1/4-inch plywood.
11
/
14
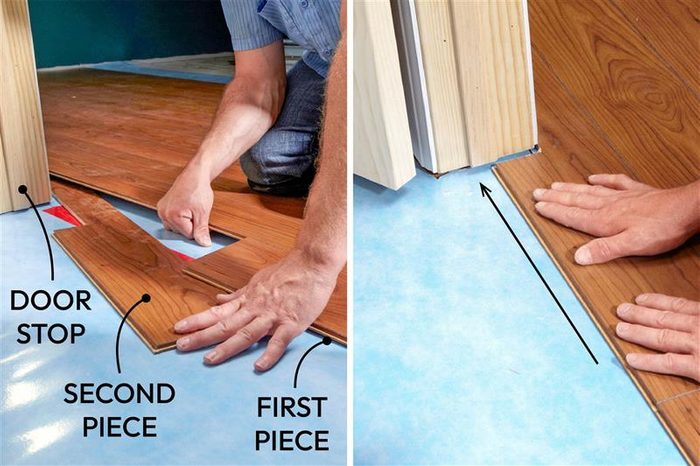
Make laying flooring around doorways easy
When you’re laying laminate flooring parallel to a doorway, you often have to make notches for both sides of the doorway on a single plank and somehow slide it next to the jamb and under the door casing. This is difficult to do without leaving visible gaps, especially when you’re ending the installation at a doorway, unless you use one of the “installing laminate flooring tips” I learned from Caruso.
It’s simple: Use a pry bar to pry the bottoms of the door casing and jambs away from the doorway. Now you can simply notch the plank and drop it into place a quarter inch from the framing. When you’re done, replace the casing and jambs by tapping the original nails back into the door frame.
12
/
14
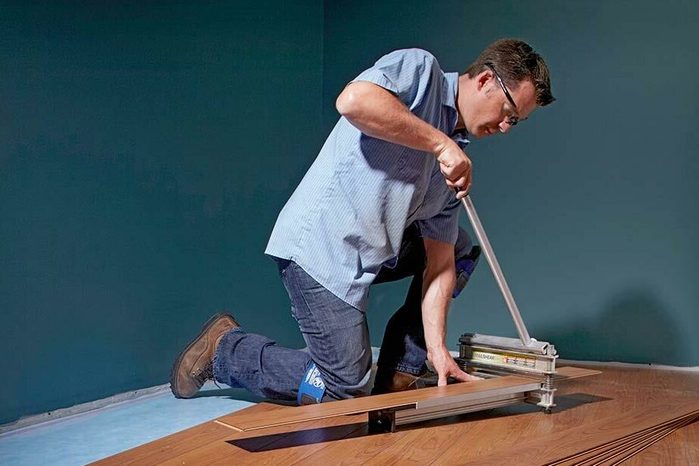
Cut laminate planks cleanly
Many laminate products, especially cheap ones, have plastic surfaces that chip and shatter when you cut them with a circular saw. You can avoid this problem in three ways.
- Use a laminate shear, which has a single blade that cuts cleanly through the material when you operate it with the levered handle.
- Cut planks from the back if you have to use a circular saw. This method avoids damage to the good side of the plank.
- Lay masking tape across the cut line and cut through the tape. This is a good way to get clean curved cuts with a jigsaw without having to transcribe your cutting line to the back of the plank, which can be confusing.
13
/
14
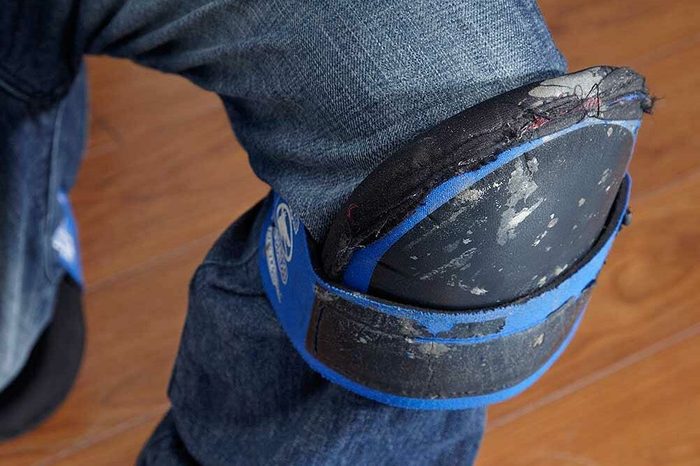
Get a good pair of knee pads
Any flooring installation involves spending a lot of time on your knees, and a laminate installation is no different. You need knee pads, but not all of them will work. Hard-shell pads that you use for landscaping and construction jobs will scratch the fragile surface of laminate planks and could force replacement of one or more of them before the job is even finished.
You need pads that have a soft material on the outside, such as cloth, foam or soft rubber, and they should have a lot of padding inside to allow you to work in comfort. Caruso gave me his gel-filled pads when he retired, and I still have them. They are lightweight, and they and help distribute weight evenly to prevent fatigue.
14
/
14

Let the floating floor float
You don’t need fasteners to install a laminate floor, and in fact, you shouldn’t use any. Any plank that you attach to the subfloor won’t be able to move with the rest of the floor, and the result may be buckling or gapping. It’s important to remember this when installing quarter-round molding around the edges of the floor. The nails should go into the walls, never the floor. I figured this out when I got a call to fix a floor that had buckled a year after installation.
On a related note, avoid setting a very heavy item, such as a pool table or safe, on a laminate floor. It will hold down the section of the floor on which you place it and prevent movement. How much weight is too much? As a rule of thumb, a refrigerator full of food represents the maximum weight a laminate floor can safely support.
About the Experts
- Naresh Caruso owned and operated We Do Floors, a flooring installation and refinishing company based in the San Francisco Bay Area. He is currently enjoying retirement in Chiang Mai, Thailand.
- Ben Kuhl is a home remodeler and CEO of Shelf Expression. He has been remodeling kitchens and bathrooms, as well as building custom shelves, cabinets home decor items in the Charlotte, NC area for the past 8 years.
- Jonathan Palley is the CEO of Clever Tiny Homes, a company that designs and manufactures tiny homes, ADUs and cabins and ships them nationwide.